

I didn’t plan on the March edition of Haven including paint. Having stitched and photographed the design, I wondered how it would look with a little extra colour for context. As it turns out, I like it both ways and thought I would share a few tips on how to achieve a pleasing finish.
I don’t use paint in my work very often but when I do I like it to hint at the solidity of something as an alternative to heavy stitching.
Lots of folk are worried about adding paint to their work and ‘ruining’ it - especially when it is added at the end when you have spent a great deal of time on the stitching.
My preference is to use watercolour when colouring linen; I find it a quick and convenient way to work. Generally I only use one or two colours for my embroidery, to add sky, grass, earth and occasionally colour to windows. The painting complements the stitching rather than vice versa.
Equipment
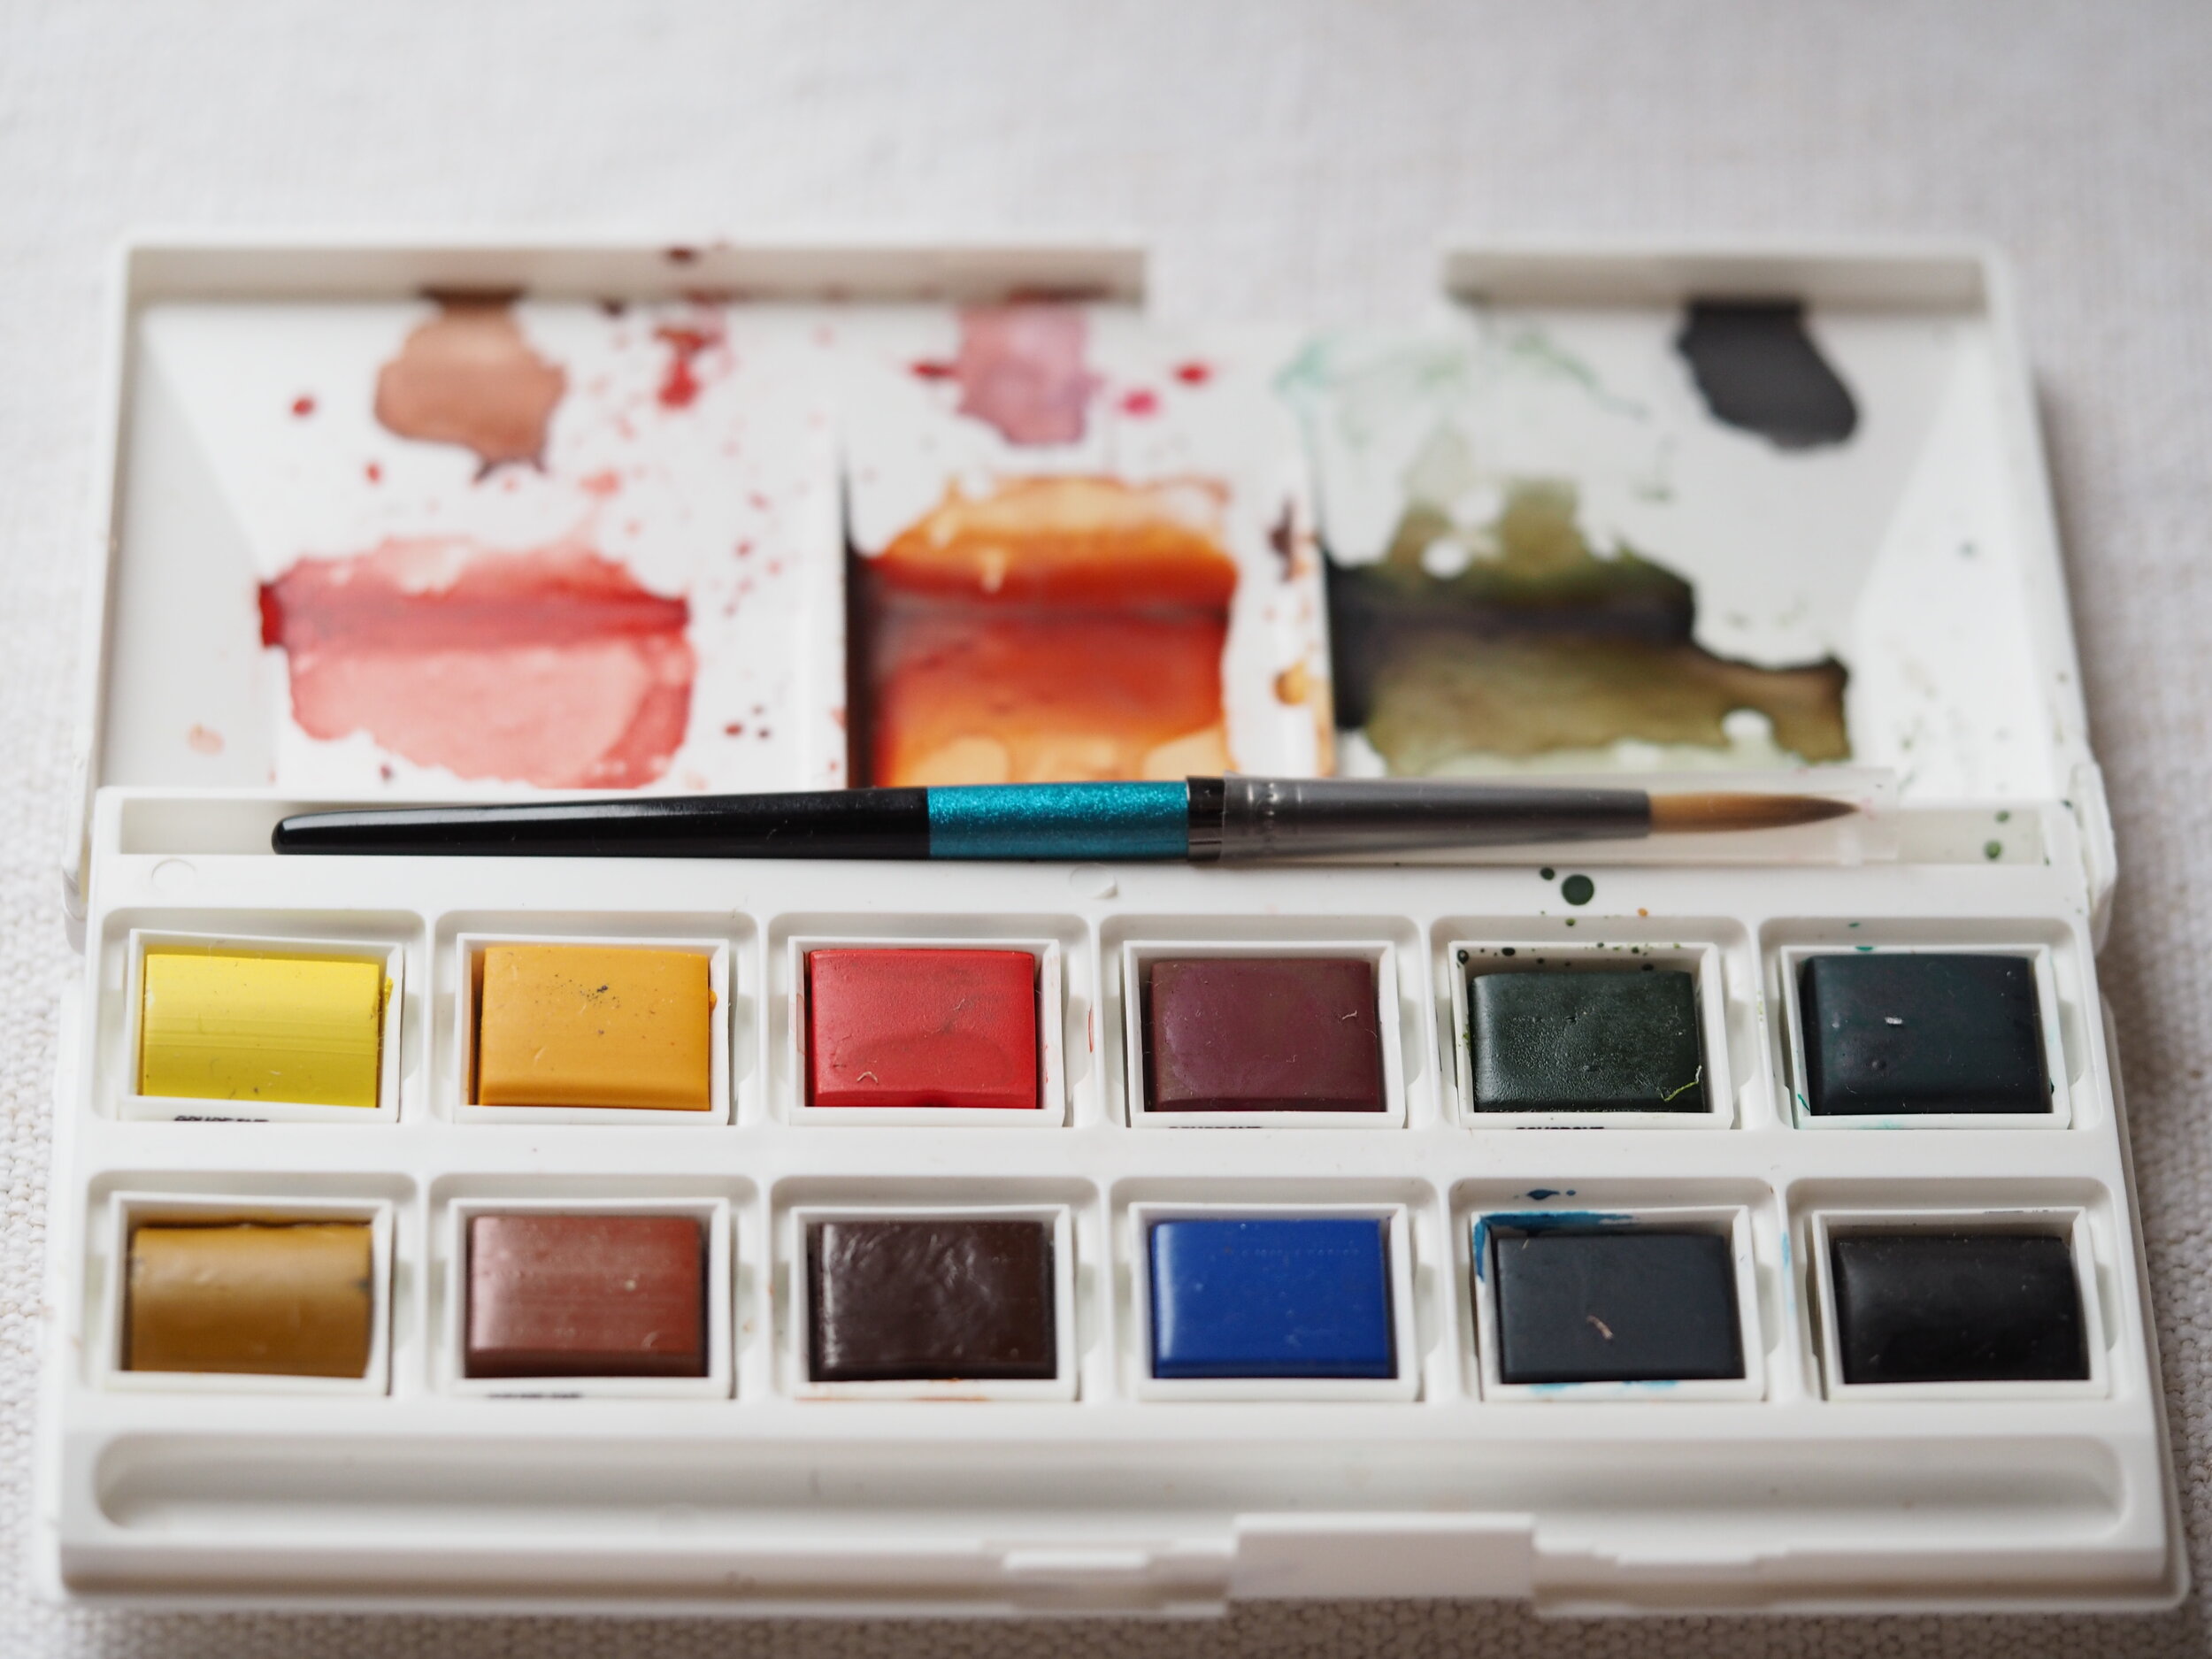
Pans of watercolour are affordable, clean and convenient to use. I have a very inexpensive Daler Rowney Aquafine pocket set which I paid about £12 for (in fact I am on my second box as my nieces begged me for my first set) and it has all of the basic colours you could need for an embroidered picture. Find it here.

If you are keen to invest in a larger set of colours that you could use to learn watercolour painting too, I love my Koi Pocket Field Sketch Box. I have the 48 pan set with a separate mixing palette, water brush and sponge. They are lovely to use both on linen and paper, I highly recommend them. The box is sturdy and the removable palette acts as extra mixing space. I haven’t had this palette for long; it was recommend by Shayda Campbell and I use it to paint along with watercolour tutorials in my spare time.
The paintbrush you choose is very important. You need a round pointed brush rather than a flat one so that you can control the amount of paint you put onto the linen. Also bear in mind that the bigger the brush, the more paint it holds and will, subsequently, transfer to a surface. For painting linen I tend to stick to three sizes: I have a size 10, a 4 and 2/0.

The size 10 is great for adding paint to large areas, such as the sky and grass. The size 2/0 is very fine and good for adding tiny spots of paint if you want to hide a bare patch of stitching or take your paint right up to an outline.
The size 4 is a good universal size to choose if you only buy one brush. Synthetic bristles are fine and very affordable.
The image below shows the difference in size between each of the brushes. The second picture also shows the opacity of a colour from neat to very dilute.
When a colour is very dilute (or watery) it soaks into the linen more quickly and its direction is more unpredictable. However, a splodge of neat watercolour (on the left) looks sticky and unnatural.


I always recommend starting with a very dilute colour; it is far easier to add extra colour and build up gently than it is to take colour away, particularly on linen. The green and blue paints above show a colouring pencil alternative with heavy to light pressure applied. Colouring pencils are a foolproof way to add colour to your embroidery and, as long as you have no plans to launder it, should last as long as paint does. Do consider colouring pencils if paints scare you!
The process
test your colours first on an off-cut of the same linen as your work or at the edge of your embroidered piece where it can be trimmed or hidden later.
Wet your brush in clean water and apply to your chosen colour. Dab the colour into a concentrated splodge onto a clean palette. Add plenty of colour so that you have enough paint to finish your piece. This ensure that the colour is consistent throughout.
Wet your brush again and add water to the paint on your palette. Mix until the colour is very pale and watery. Mix thoroughly and soak your bristles in the paint mix.
Remove any excess water from the ferrule of your paintbrush (the metal bit near the bristles) with a paper towel and apply lightly to your fabric. Start in the centre of a space moving outward towards the outline. Dab rather than brush the paint on.
I like to leave areas of the linen showing through but you can cover the entire space with paint if you prefer. Dab the paint gently and take particularly at the outline where the colour can easily spread.
I use a larger brush for the centre of a shape and colour around the outline with my very fine brush.
When you think you have finished an area, dry it with a hairdryer (beware that any frixion pen markings will remove with the heat too). You will notice that the paint looks much brighter and lighter when dry.
Finish the rest of the painting of your embroidery with a very light hand before drying off and evaluating. If you want to add more colour do so carefully and build the colour slowly, drying in between each application.
When you have finished your work, press with a dry iron face down on a fluffy towel so as not to squash your stitches. The heat of the iron will set the colour to the fabric making your finished piece more colourfast (although I do not recommend washing the finished piece).
If you make a mistake you can cover the area with more flowers, grass or foliage. Don’t stress about it and just enjoy the process.
I hope these tips help a little and give you confidence in choosing your colours and applying them to the fabric. For this particular piece I used an olive green gold for the grass (but sap green is a more commonly found colour), prussian blue for the sky and burnt umber for the paving stones. I used a very dilute Payne’s grey for the window panes. All of the colours were watered down considerably before I applied them to the fabric.
If you have any questions drop me a line. I will be filming a quick painting demo shortly which I hope to share at the weekend.
Happy painting!
Nicki xx
(pin for later)
